
Kitchen lighting zones divide your space into task (500 lux food prep), ambient (300 lux general), and accent (shelving/displays) areas. Multi-gang dimmers independently control each zone from one wall plate—no neutral wire required in UK homes. This eliminates multiple switches while allowing you to adjust brightness for cooking, dining, or entertaining instantly.
Check: How Can You Control Lights Away From Home Easily?
What Are Kitchen Lighting Zones and Why Do They Matter?
Kitchen zones are distinct activity areas—cooking, dining, and storage—each requiring different lighting intensity and mood. Zoning prevents the common mistake of using a single central light that casts shadows during food prep and creates an unwelcoming atmosphere during entertaining. Proper zones ensure safety, functionality, and ambiance.
Modern kitchen design recognises that a single overhead light simply doesn't work. The way you dice onions demands bright, focused illumination; the way you sip wine at the island requires softer, layered light. Without zone-based lighting, you'll either feel like you're working under interrogation or cooking in a cave—neither is practical or pleasant.
Kitchen zones typically fall into three categories: the working area (countertops, hob, sink), the storage area (open shelving, display cabinets), and the dining or entertaining area (island, breakfast table). Each demands its own lighting strategy and, crucially, its own independent control. This is where multi-gang dimmers become invaluable: they allow you to manage separate circuits from a single, elegant wall plate without cluttering your kitchen with multiple switches.
The practical benefit is significant. Rather than fumbling between three separate switches to adjust your kitchen's mood, a 2-gang or 3-gang dimmer lets you control task and ambient lighting independently—or even add a third circuit for accent lighting—all from one location. For UK homeowners, this means fitting standard 25mm back boxes without requiring a neutral wire, simplifying both installation and aesthetics.
How Do the Three Lighting Layers (Task, Ambient, Accent) Work Together?
Task lighting provides bright, focused illumination for food prep and cooking. Ambient lighting delivers overall room brightness and comfort. Accent lighting highlights architectural features or displays. Together, these three layers create a complete, flexible lighting environment that adapts to different activities and moods throughout the day.
Think of layering like dressing for an occasion. Ambient is your base layer—the shirt that covers everything and sets the tone. Task lighting is your trousers: essential and functional, ensuring you can actually work safely. Accent lighting is your accessories: the finishing touch that transforms a plain outfit into something intentional and stylish. Skip any layer, and the overall effect feels incomplete.
Ambient lighting provides general illumination across the entire kitchen, ensuring you can move safely and comfortably at any time of day. This typically comes from recessed downlights, flush-mounted ceiling fixtures, or pendant lights. Ambient lighting should be soft enough not to create glare or harsh shadows, yet bright enough to serve as a functional baseline. In most kitchens, ambient lighting alone is insufficient for detailed work.
Task lighting is the workhorse. It illuminates specific work surfaces—countertops, the hob, the sink—with focused, bright light that eliminates shadows and prevents accidents. Under-cabinet LED strips and directional spotlights are the classic solutions here. Without task lighting, you're essentially gambling with your fingers when chopping ingredients or washing delicate items.
Accent lighting is pure theatre. It highlights what you want to showcase: lit shelves, a glowing splashback, or illuminated display cabinets. Does it help you cook pasta? No. Does it make your kitchen look intentional, layered, and expensive? Absolutely. Accent lighting adds visual depth and transforms a purely functional space into one that feels designed.
The magic happens when you control these layers independently. A multi-gang dimmer lets you dial down ambient light for an intimate dinner while keeping task lighting bright enough for safe food prep. Or boost accent lighting during entertaining while dimming everything else. This flexibility is what separates a good kitchen from a great one.
What Lux Levels Should Each Kitchen Zone Have?
Food preparation areas require 500 lux (bright, shadow-free). General kitchen areas need 300 lux (comfortable overall lighting). Storage and display zones typically use 150–200 lux (softer, accent-style). A typical 100-square-foot kitchen requires 7,000–10,000 lumens total to meet these standards safely and comfortably.
Lux is the measurement of light intensity at a surface—essentially, how bright something feels to your eye. It's the difference between "I can safely chop vegetables" and "I'm squinting and might lose a finger." Understanding lux requirements ensures your dimmer setup delivers the right brightness for each zone.
For food preparation, aim for 500 lux minimum. This is bright enough to see clearly, avoid shadows, and work safely with sharp tools. Under-cabinet LED strips positioned 12–18 inches from the edge of upper cabinets typically deliver this intensity directly onto countertops. If you're using a 2-gang dimmer, this zone would occupy one gang, allowing you to adjust task brightness independently.
For general kitchen areas (ambient lighting), 300 lux is the sweet spot. This is bright enough to navigate comfortably and feel welcoming, but not so intense that it creates glare or fatigue. Recessed downlights or ceiling-mounted fixtures typically achieve this. Spacing matters: a general rule is 70–100 lumens per square foot, so a 100-square-foot kitchen needs approximately 7,000–10,000 lumens total across all lighting layers.
For storage and display areas, 150–200 lux is sufficient. Shelving lights, plinth strips, and accent fixtures create visual interest without overwhelming the space. These are often controlled separately via a third gang on a multi-gang dimmer, allowing you to highlight displays during entertaining while keeping them subtle during everyday use.
How Can Multi-Gang Dimmers Control Different Zones Independently?
Check: Which 4 Gang Dimmer Switch is Best for Your UK Home? A Complete Buying Guide
Each gang on a multi-gang dimmer controls a separate lighting circuit independently. A 2-gang dimmer lets you manage task and ambient lighting from one wall plate; a 3-gang adds accent control. Each rotary dial adjusts brightness separately, and you can programme minimum/maximum levels to prevent flickering and optimise LED performance across all zones.
The practical beauty of a multi-gang dimmer is elegance through consolidation. Instead of installing three separate switch plates scattered around your kitchen, you install one. Instead of fumbling between multiple controls, you adjust brightness with two or three intuitive rotary dials.
Here's how it works: each gang is wired to a separate circuit. Gang one might control under-cabinet task lighting; gang two controls island pendant ambient lighting. When you turn the first dial, only the under-cabinet lights respond. Turn the second dial, and only the pendants brighten or dim. This independence is crucial for creating the right mood for different activities.
For example, during food prep, you'd keep task lighting bright (500 lux) while dimming ambient lighting to reduce glare and heat. During entertaining, you'd soften task lighting and boost ambient and accent layers to create a welcoming, sophisticated atmosphere. A 2-gang dimmer makes these transitions seamless.
Repenic's 2-gang and 3-gang dimmers support both trailing-edge and leading-edge dimming modes, automatically adjusting maximum brightness to prevent flickering with dimmable LEDs. They also feature programmable minimum brightness settings (1–50%), which is essential for LED compatibility: many budget LEDs won't illuminate below 10–20% brightness, so setting a programmable minimum ensures smooth dimming across your entire range.
For kitchens with multiple work areas or open-plan layouts, a 3-gang dimmer adds a third circuit for accent lighting. This gives you complete flexibility: task, ambient, and accent all controlled from one elegant wall plate.
Which Dimmer Configuration Is Right for Your Kitchen Layout?
Small kitchens typically need a 1-gang dimmer (ambient) plus under-cabinet task lighting on a simple switch. Medium kitchens benefit from a 2-gang dimmer (ambient + task). Open-plan kitchens with islands and accent features often require a 3-gang dimmer (ambient + task + accent). Choose based on your circuit count and the number of zones you want to control independently.
Your kitchen's size and layout determine the optimal dimmer configuration. There's no one-size-fits-all solution, but here's a practical framework:
Small Kitchens (under 100 sq ft): A single flush ceiling light or two recessed downlights provide ambient lighting. Under-cabinet LEDs handle task lighting via a simple switch or 1-gang dimmer. Accent lighting is minimal or absent. If you want independent control, a 1-gang dimmer for ambient plus a separate under-cabinet circuit works well. Alternatively, a 2-gang dimmer gives you flexibility for future upgrades without rewiring.
Medium Kitchens (100–200 sq ft): A grid of 4–6 recessed downlights or 2–3 pendant lights create ambient lighting. Spotlights over the hob, sink, and main counters provide task lighting. A plinth light or lit shelf adds subtle accent. A 2-gang dimmer is ideal here: one gang controls ambient (downlights or pendants), the second controls task lighting (under-cabinet strips and spotlights). This gives you complete control without clutter.
Open-Plan Kitchens (200+ sq ft): Multiple pendant lights over the island, track lighting, and extensive under-cabinet LED strips create a complex lighting environment. Cabinet lights, wall washers, and accent features add visual interest. A 3-gang dimmer becomes essential: one for ambient (pendants and ceiling lights), one for task (under-cabinet and counter spotlights), and one for accent (cabinet and display lighting). This allows scene-based control: "cooking mode" (bright task, soft ambient), "family breakfast" (bright ambient and task), or "entertaining mode" (soft task, bright ambient and accent).
| Kitchen Size | Ambient Lighting | Task Lighting | Accent Lighting | Recommended Dimmer |
|---|---|---|---|---|
| Small (<100 sq ft) | 1–2 ceiling fixtures | Under-cabinet LEDs | Optional/minimal | 1-gang or 2-gang |
| Medium (100–200 sq ft) | 4–6 recessed or 2–3 pendants | Under-cabinet + spotlights | Plinth or shelf lights | 2-gang |
| Open-Plan (200+ sq ft) | Multiple pendants + ceiling lights | Extensive under-cabinet + track | Cabinet, wall wash, accent features | 3-gang or smart multi-gang |
How Do You Wire a 2-Gang Dimmer for Under-Cabinet and Island Lighting?
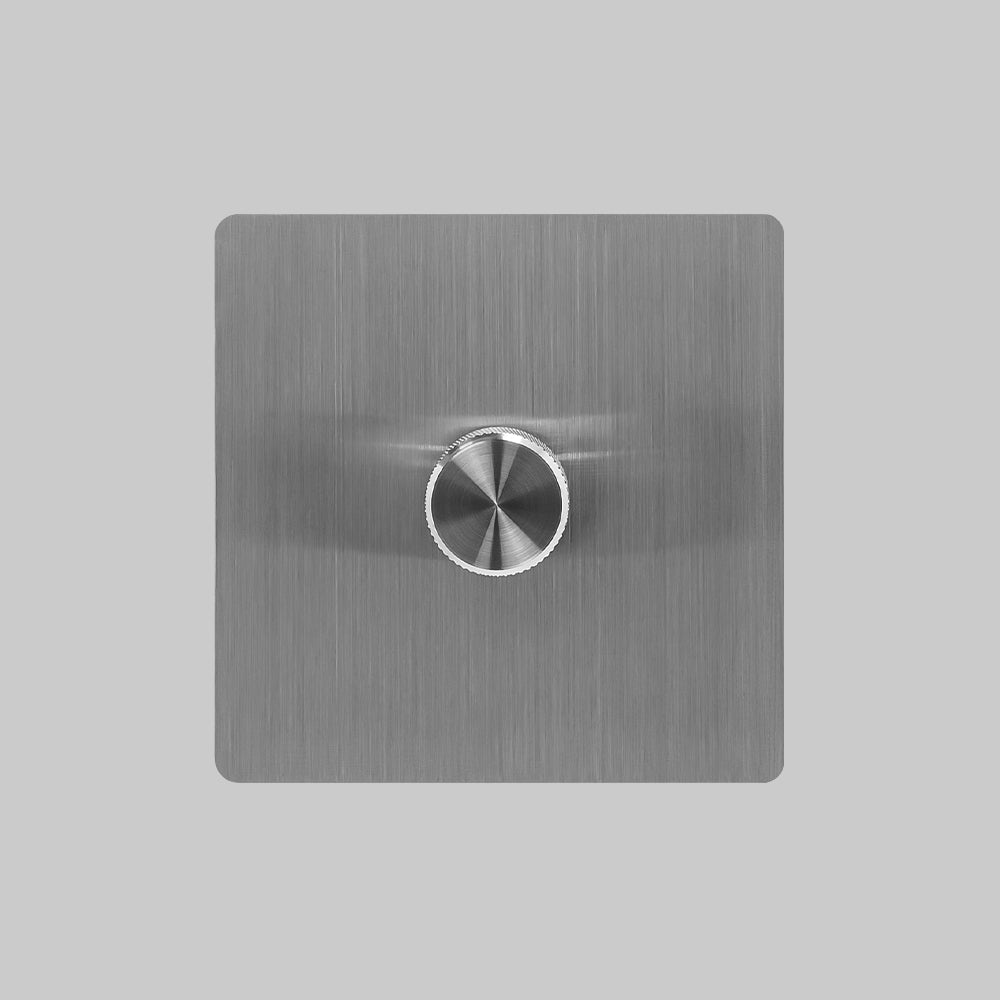
Wire one gang to under-cabinet task lighting (via a dedicated 230VAC circuit) and the second gang to island pendant ambient lighting (via a separate circuit). Each circuit runs independently to the dimmer; the dimmer's two rotary dials control brightness separately. Installation requires a minimum 25mm back box and must be performed by a qualified electrician to meet UK Building Regulations.
This is the most common kitchen dimmer setup, and for good reason: it solves the practical problem of controlling your two most important lighting zones from one elegant wall plate.
Circuit Layout: Under-cabinet LEDs typically run on their own dedicated circuit, wired directly to the dimmer's first gang. Island pendants occupy a second circuit, wired to the dimmer's second gang. Each circuit is independent: they don't share a return wire, and each operates at its own brightness level.
Back Box and Installation: Repenic dimmers are designed for UK homes and require a minimum back box depth of 25mm—the standard for most UK installations. Crucially, no neutral wire is required, which simplifies wiring in older homes or where neutral conductors are difficult to access. The dimmer must be installed by a qualified electrician to ensure compliance with UK Building Regulations and electrical safety standards.
Load Considerations: A Repenic 2-gang dimmer with 250W capacity (RD-250) can handle up to 212W per gang when installed as a 2-gang unit (due to multi-gang de-rating). This is typically sufficient for under-cabinet LED strips (usually 20–50W) and pendant lights (typically 40–80W per fixture). If your kitchen has heavier loads—for example, multiple large pendant fixtures or extensive LED strips—the 400W model (RD-400) offers 340W per gang at 2-gang, providing additional headroom.
Dimming Mode: Both gangs can be set to trailing-edge or leading-edge dimming. Trailing-edge (the default) is best for most dimmable LEDs and incandescent bulbs. Leading-edge works well with certain halogen fixtures. The dimmer automatically adjusts maximum brightness to prevent flickering, and you can programme the minimum brightness (1–50%) to ensure smooth, flicker-free dimming across your entire range.
Practical Example: Your under-cabinet LEDs (30W) are wired to gang one. Your three island pendants (60W total) are wired to gang two. You programme gang one's minimum brightness to 15% (preventing the LEDs from flickering at very low levels) and gang two's minimum to 10%. Now, during food prep, you dial gang one to 100% (bright task lighting) and gang two to 40% (soft ambient). During entertaining, you reverse this: gang one at 30% (subtle task light) and gang two at 100% (bright, welcoming ambient). All from one wall plate.
What LED Compatibility and De-Rating Should You Know Before Installing?
Not all dimmers work smoothly with all LEDs; choose a dimmer rated for "dimmable LED (R,C)"—trailing-edge, constant-current compatible. Multi-gang dimmers de-rate per gang (e.g., 250W single gang becomes 212W per gang at 2-gang). Verify your total LED wattage fits within the de-rated limit, and use the dimmer's programmable minimum brightness to prevent flickering at low levels.
LED dimming is more complex than incandescent dimming, and this is where many kitchen lighting projects fail. Budget dimmers don't play nicely with all LEDs, resulting in flickering, buzzing, or refusal to dim below a certain level. Repenic dimmers are specifically engineered for LED compatibility, but understanding the technical details ensures your installation performs flawlessly.
Dimmer-LED Compatibility: Dimmers designed for "dimmable LED (R,C)" use trailing-edge technology and constant-current compatibility, which works with the vast majority of modern dimmable LED bulbs and strips. Repenic's dimmers support this standard and automatically adjust maximum brightness to prevent flickering—a feature that's essential when mixing different LED types on the same circuit.
Multi-Gang De-Rating: This is critical. A Repenic 2-gang dimmer with 250W capacity doesn't mean each gang handles 250W. Instead, the capacity is shared and de-rated based on the number of gangs:
| Configuration | RD-250 (250W model) | RD-400 (400W model) |
|---|---|---|
| 1-Gang | 250W | 400W |
| 2-Gang | 212W per gang | 340W per gang |
| 3-Gang | 175W per gang | 280W per gang |
| 4-Gang | 125W per gang | 200W per gang |
This de-rating accounts for heat dissipation in multi-gang setups. A typical kitchen with 30W under-cabinet LEDs and 60W of pendant lighting easily fits within a 2-gang dimmer's capacity, but always verify your actual wattage before installation.
Programmable Minimum Brightness: One of the most useful features on Repenic dimmers is programmable minimum brightness (1–50%). Many dimmable LEDs won't illuminate smoothly below 10–20% brightness; they flicker or refuse to turn on. By setting the dimmer's minimum to 15–20%, you ensure smooth dimming across your entire practical range. This is especially important for under-cabinet LEDs, which can be temperamental at very low levels.
BOOST Mode: Repenic dimmers include a BOOST mode (disabled by default) that helps LEDs that won't illuminate at low levels. If you find certain fixtures won't dim smoothly, enabling BOOST provides an extra push at startup, solving the problem without replacing the dimmer.
Can Smart Dimmers Add Scene Control to Your Kitchen Zones?
Yes. Repenic's Zigbee 3.0 smart dimmers enable scene-based control: set "cooking mode" (bright task, soft ambient), "family breakfast" (balanced lighting), or "entertaining mode" (bright ambient, soft task) and activate any scene with a single tap. Smart control also provides energy monitoring, scheduling, and integration with platforms like Google Home and Homey.
For homeowners seeking maximum flexibility, smart dimmers elevate zone control from manual adjustment to intelligent, automated scenes. Instead of manually dialling your dimmer each time you switch activities, you programme scenes once and recall them instantly.
Repenic's Zigbee 3.0 smart dimmers work in 1-gang, 2-gang, 3-gang, and 4-gang configurations, available in solid brass, stainless steel, or white finishes. They're installed exactly like standard dimmers (no neutral wire required, 25mm back box compatible) but add wireless control via any Zigbee 3.0 gateway. This means you can control your kitchen zones from your smartphone, voice assistant, or pre-programmed scenes.
Scene Examples for Kitchen Zones:
"Cooking Mode": Task lighting (under-cabinet) at 100%, ambient (island pendants) at 40%, accent at 10%. You're safe and focused on food prep, with minimal glare.
"Family Breakfast": All zones at 70–80%. Bright enough for safety, soft enough for a relaxed morning atmosphere.
"Entertaining Mode": Task lighting at 30%, ambient at 100%, accent at 80%. Your kitchen feels sophisticated, welcoming, and designed—not like a workspace.
"Late-Night Snack": All zones at 20%. Enough light to navigate safely without waking the household or creating harsh shadows.
Beyond scenes, Repenic smart dimmers offer real-time energy monitoring (so you see exactly how much your lighting costs), scheduling (dim lights automatically at sunset), and integration with platforms like Google Home, Homey, and Hubitat. For open-plan kitchens, this level of control is transformative: you can switch from "family breakfast chaos" to "cocktail night chic" with one tap.
Repenic Expert View: "The most common mistake we see in kitchen lighting is treating all zones with the same brightness. Homeowners install a grid of recessed downlights and wonder why the space feels flat and unwelcoming. The solution isn't more lights—it's independent control. A 2-gang or 3-gang dimmer lets you balance task, ambient, and accent lighting instantly, adapting to cooking, dining, or entertaining without rewiring or replacing fixtures. For UK homes, our dimmers require no neutral wire and fit standard 25mm back boxes, making zone control accessible to any renovation project. Whether you choose manual dimmers for simplicity or Zigbee smart dimmers for scene-based automation, the result is a kitchen that's both functional and beautiful."
Conclusion
Kitchen lighting zones aren't a luxury—they're essential for a space that's both safe and beautiful. By dividing your kitchen into task (food prep), ambient (general comfort), and accent (visual interest) zones, and controlling each independently via a multi-gang dimmer, you create a lighting environment that adapts to every activity and mood.
The practical advantage is significant: instead of multiple switches cluttering your kitchen, a single 2-gang or 3-gang dimmer consolidates control into one elegant wall plate. For UK homes, Repenic's dimmers require no neutral wire, fit standard 25mm back boxes, and are specifically engineered for dimmable LED compatibility—meaning your investment is both beautiful and future-proof.
Whether you're upgrading a small kitchen or designing an open-plan renovation, the principle remains the same: zone your lighting, control each zone independently, and adjust brightness to match your activity. The result is a kitchen that's as practical for daily cooking as it is impressive for entertaining.
Frequently Asked Questions
Q: Do I need a neutral wire for a Repenic dimmer?
A: No. Repenic dimmers are designed for UK homes and require no neutral wire, simplifying installation in older properties or where neutral conductors are difficult to access.
Q: Can a 2-gang dimmer handle both under-cabinet LEDs and island pendants?
A: Yes. A Repenic 2-gang dimmer de-rates to 212W per gang (RD-250) or 340W per gang (RD-400), which is typically sufficient for under-cabinet LEDs (20–50W) and pendant fixtures (40–80W each). Always verify your actual wattage before installation.
Q: Will my dimmable LEDs work smoothly with a Repenic dimmer?
A: Yes, provided your LEDs are rated "dimmable" and the dimmer is set to trailing-edge mode (the default). Repenic dimmers automatically adjust maximum brightness to prevent flickering and include programmable minimum brightness (1–50%) to ensure smooth dimming across your entire range.
Q: What's the difference between a manual dimmer and a smart Zigbee dimmer for kitchen zones?
A: Manual dimmers offer simple, reliable rotary control with no batteries or apps required. Smart Zigbee dimmers add scene-based automation, energy monitoring, scheduling, and voice control via Google Home or other platforms—ideal for homeowners seeking maximum flexibility and convenience.
Q: Can I use a 3-gang dimmer in a small kitchen?
A: Yes. A 3-gang dimmer gives you future flexibility: you can start with task and ambient control now and add accent lighting later without rewiring. The de-rating per gang remains the same (175W per gang for RD-250, 280W for RD-400), so capacity isn't an issue.